There are many individuals today who are using trail cameras in order to capture animals such as deer in their natural habitat. In fact, these game cameras are definitely here to stay considering the growing trend of more sophisticated cameras that work on different conditions. Sturdy, easy to use, and cameras that produce high-quality image and videos, these are just some of the things that you can expect from game cameras.
Game cameras play a huge role for hunters and even for conservationist trying to have an idea about the population of animals in a particular area. Having your very own trail camera is considered a valuable asset. But you have to understand exactly how each camera works. You have to understand how to set it up correctly in order to get the best images and videos whether it is day or night.
Not knowing how to use trail cams can simply prevent you from getting the images and videos that you expect from the camera. In reality, it is a skill that you can hone over time. It may also take some trial and error in order to get the best photos and videos.
Check Out How To Setup and Use Trail Cameras
Our purpose for this article is to help you minimize your mistakes from using to setting up the camera in the wild. You will also understand the differences between different brands in terms of set up and usage.

Setting up of trail cameras
One of the most important things that you need to know in how to use trail cams is its set up. So how exactly do you set up a game camera? There are slight differences from one brand to the next. Be sure to read the manual in order to see the particular details.
However, a common step that every user needs to do is to make sure that they take everything out of the box the moment that it has arrived on their doorstep.
Make sure that everything in the inventory list is in the box and there is no any obvious defect found on the camera’s body. In addition to this, it is important for the user to first update the camera’s firmware. This should, in fact, be the first order of business after seeing that everything is complete in the box as promised.
The next step is to make sure that you know exactly how to use the camera. How many batteries do you need? What about the detection range of the camera?
These are the details that you will have to understand before even bringing the camera to the wild. You also need to make sure that you know exactly how to turn the camera on and choose between the different configurations.
Be sure to know exactly the different modes and how it comes in handy in different scenarios. This way, you will be able to switch smoothly from video to taking photos in rapid succession and ultimately, be able to maximize the use of your game camera.
Next, you will need to set the SD card and the battery. This is the perfect time for you to ensure that the camera is working properly. Make sure that the trigger speed, timer, flash, and other aspects of the camera are working.
If you just started using the camera, be sure that you are going to check the first few photos and videos immediately. This way, you know for sure that the camera is working and that your photos and videos are saved on the card as advertised.
Next, you want to first make sure that you survey the area that you want to observe. This ensures that you are going to maximize the camera’s presence in the outdoors. Be sure that you know the tips on how to spot an area that is high in traffic of the animal that you want to observe.
On the other hand, if you are going to use it as home security, you want to make sure that it is placed in an ideal location that can observe people heading to your property.
If you are going to observe wildlife such as a deer, it is best if you take into consideration mineral sites and feeders whenever you are setting the camera in order to maximize the results. And of course, you want to have the perfect height for observing wildlife. Depending on who you will ask, there are those who prefer the cameras to be found in the bushes on a tripod while there are those who prefer to tie the camera on a tree around knee high from the ground.
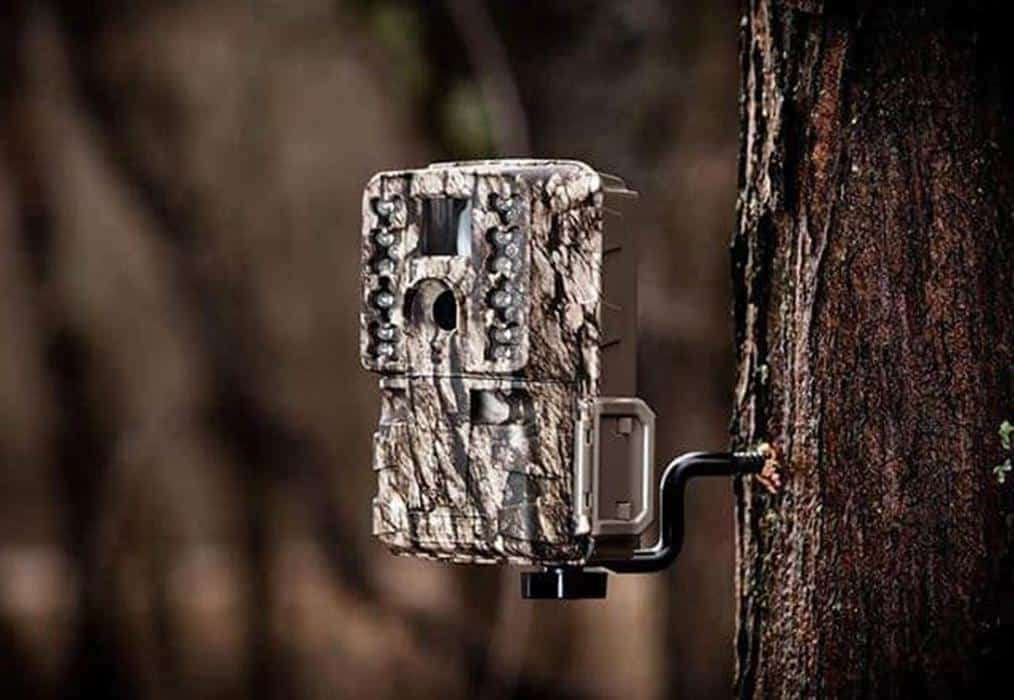
There are different ways how you can set up the camera to a tree. Some make use of a bungee cord while there are those who make use of straps that go with the camera. Other than this, you can also get a separate mount that can make things so much easier especially when dealing with an unpredictable weather that might knock off your camera when it has been installed.
Also, be sure that you knock down vegetation that could potentially be blocking the view on your camera. You don’t want photos of a branch that is being blown by the wind.
You will also need to make sure that you consider the direction of the sunset and sunrise. You don’t want to get overexposed shots. You want the camera to be a bit to the side of sunrise in order to get the right exposure even during the morning.
Usage of trail cameras

Game cameras are highly versatile devices. In fact, different brands will most likely give you different features and surprises. These weatherproof cameras have become a handy tool not only for hunters and conservationists but also for people who are trying to monitor their home.
A lot of photographers have made use of game cameras in order to monitor animals. This way, they know exactly where to go and around what time to take the photo. At the same time, there are those photographers that are using the game cameras to get high-quality photos and videos.
As for conservationists, they usually make use of these game cameras in order to take a closer look at the population of a particular animal in the wild. This comes in handy as an educational tool which can give conservationists an insight into how the animals are actually moving in the wild on a particular season.
On the other hand, hunters use these cameras whenever they decide to take a closer look at the behavior of the animals such as deer. This way, they don’t waste so much time exploring different places only to end up with nothing.

And lastly, you have families that use the cameras for security purpose or even as a nanny cam. This gives them the opportunity to review what happened both inside and outside the house. And since some game cameras can now transmit videos via WiFi or via text, it becomes convenient to see the photos even without taking out the memory card.
But of course, the usage of the camera depends on its specs. There are cameras, for instance, that have no capacity to send images via email and text. On the other hand, there are cameras that have no-glow features that can minimize the chances of alarming animals at night. Usually, most game cameras, especially lower end ones, still have LEDs that still lights up which could potentially alarm animals being observed.
The recovery time and different modes will also play a huge role how the camera is being used. You want the camera to be ready to take a video or photo with minimal lag time especially when the trail camera has been used for home security.
Detection range also matters how it is going to be used in the wild. There are those cameras that have a decent angle that the camera can capture. And of course, you also have to take into consideration the quality of the photo and video. For game cameras that have been designed to be left for a couple of weeks into the wild, a lot of its designers opted to not have HD functions. This way, it is possible to save a lot of photos and videos on a 32 gig memory card.
Monitoring

A lot of people make the mistake of checking the memory card every now and then. In fact, this can be considered counterproductive. As rule of thumb, you want to check the memory card after a week or two. When using a 32 gig card, it would be sufficient enough to take photos and videos in the wild for the next week or two.
What you want is to make sure that there is no unneeded interference whenever you are using the camera.
But of course, you have to make sure that you know the camera’s detection range. From the angle to the distance that the camera is allowed to detect, these are some things you should first know in order to get the best results.
In addition to this, you have to always ensure that the camera is going to be using only a blank memory card. There is a possibility that the unit is not going to accept the card if it is partially used or it is already full.
Be sure to also check if it hasn’t been knocked around by animals or even by the elements.
There are instances wherein you will have to reset the camera and make sure that it points to the direction that you prefer.
You also want to make sure that you have multiple game cameras on hand if you are going to observe different trails. This makes sure that you get as many images and videos that you need whenever you are working outdoors. You can also easily determine which areas are high traffic routes for deer.
Maintenance Of Trail Camera
Another crucial facet of learning how to use trail cams is learning the most basic maintenance work that goes along with it. Just like any electronic, it is important to make sure that the camera is going to get the necessary maintenance in order to make sure that the camera is going to function well. It is always a good idea that you maintain the camera during the days when you are not in the wild and the camera is not being used.
Maintenance work can be done from the outside to the inside. First, you want to check for any sign of exterior damage on the game camera. There is a chance that the camera’s electronic parts might malfunction if its exterior has lost its weatherproof capacity. A lot of animals will lick and observe the camera, thus, consider the reality that it might get knocked around especially when you failed to install the camera properly in the woods.
You also want to make sure that you clean the lens. Usually, dirt and moisture might make the lens foggy stopping you from taking superb photos and videos.
You don’t want to just use any type of material when cleaning the lens because some fabrics may end up scratching your camera’s lens instead. You want to use microfiber cloths and proper lens cleaning liquid to get rid of the dirt and animal saliva.
The buckles and the straps should also be observed and replaced if needed. This will ensure that the trail camera is going to be used in the outdoors without any problem.
You also want to check for any sign that insects or any pest may have made its way inside your camera. There are instances wherein these small insects can do a significantly higher damage than animals. It is highly suggested that you spray a bit of insecticide on your unit’s housing before using it in the wild.
Next, you also want to take the battery out if the camera isn’t being used. Just like any other electronic item, this can corrode the contacts. If you are already dealing with corrosion, use a small amount of white vinegar and wipe it using a cotton on the camera’s contact.
What is the best way to position a trail camera?
Positioning a trail camera effectively involves several considerations to ensure you capture the best possible footage of wildlife. Here are some tips to help you set up your trail camera:
1. Location Selection
- Animal Trails: Place the camera along known animal trails, water sources, or feeding areas.
- Natural Funnels: Position the camera in areas where terrain naturally funnels wildlife, such as between dense vegetation or along ridgelines.
2. Camera Height
- Deer and Larger Animals: Mount the camera at about waist height (3-4 feet off the ground).
- Smaller Animals: For smaller wildlife, position the camera lower, around 1-2 feet off the ground.
3. Angle and Distance
- Optimal Distance: Place the camera about 10-20 feet from the target area to ensure clear images without spooking the animals.
- Angle: Aim the camera slightly downward if possible, and try to set it at a 45-degree angle to the trail rather than directly facing it to increase the chance of capturing a full-body shot of the animal.
4. Camera Settings
- Sensitivity: Adjust the motion sensor sensitivity to match the expected animal size and movement speed.
- Photo vs. Video: Decide whether you want still photos or videos based on your goals. Videos can provide more context but use more memory and battery.
5. Avoiding Detection
- Camouflage: Use natural cover like bushes or tree branches to conceal the camera, but ensure it doesn’t obstruct the lens or sensors.
- Scent Control: Wear gloves while handling the camera and avoid touching it with bare hands to minimize human scent.
6. Lighting and Environment
- Sunlight: Avoid placing the camera facing directly east or west to prevent glare from the rising or setting sun.
- Background: Ensure there’s a clear background with some contrast to help distinguish the animals.
7. Maintenance
- Regular Checks: Periodically check the camera to ensure it’s functioning properly, the batteries are charged, and the memory card has enough space.
- Weatherproofing: Ensure the camera is securely mounted and weatherproofed to withstand rain, snow, and wind.
By considering these factors, you can effectively position your trail camera to maximize your chances of capturing quality footage of wildlife.
Do trail cameras need Wi-Fi?
Trail cameras do not necessarily need Wi-Fi to function, but Wi-Fi-enabled trail cameras offer several advantages and conveniences. Here’s a comparison of the two types:
Non-Wi-Fi Trail Cameras
Advantages:
- Simplicity: These cameras are typically easier to set up and use since they don’t require a Wi-Fi connection.
- Reliability: Without the need for a Wi-Fi signal, they can be placed in more remote areas where a connection might be weak or non-existent.
- Battery Life: Generally, they consume less power compared to Wi-Fi models, resulting in longer battery life.
Disadvantages:
- Manual Retrieval: You need to physically retrieve the memory card or connect the camera to a device to view the captured images and videos.
- Limited Remote Monitoring: There’s no way to monitor the camera or access its footage remotely.
Wi-Fi-Enabled Trail Cameras
Advantages:
- Remote Access: You can access photos and videos remotely via a smartphone or computer, provided the camera is within Wi-Fi range.
- Instant Notifications: Some models can send real-time alerts when they detect motion, allowing for immediate monitoring.
- Convenient Updates: Firmware updates and setting adjustments can often be done remotely.
Disadvantages:
- Wi-Fi Range Limitation: The camera needs to be within range of a Wi-Fi network, which might not be feasible in remote areas.
- Power Consumption: Wi-Fi functionality can drain the battery faster, potentially requiring more frequent battery changes or a more robust power solution.
- Setup Complexity: They can be more complicated to set up due to the need to connect to a Wi-Fi network.
Conclusion
- For Remote Locations: Non-Wi-Fi trail cameras are usually more suitable for remote areas with no Wi-Fi access and for users who don’t mind manually retrieving the footage.
- For Accessible Locations: Wi-Fi-enabled trail cameras are ideal for areas within Wi-Fi range and for users who prefer the convenience of remote access and real-time monitoring.
Choose the type of trail camera based on your specific needs, the location where you plan to place the camera, and your preference for convenience versus simplicity and battery life.
Wrap up
Once you have done all of the things that we have mentioned, make sure to take a few photos and videos to see if the trail camera is working properly.
Hope you found this post helpful.
Related Post: